


 About Urh Social
 Terms of Service
 Πολιτική Ιδιωτικότητας
 Contact
House Painting Done Right: Correct Process, True Costs, Seasonal Timing & The 80/20 Rule Explained
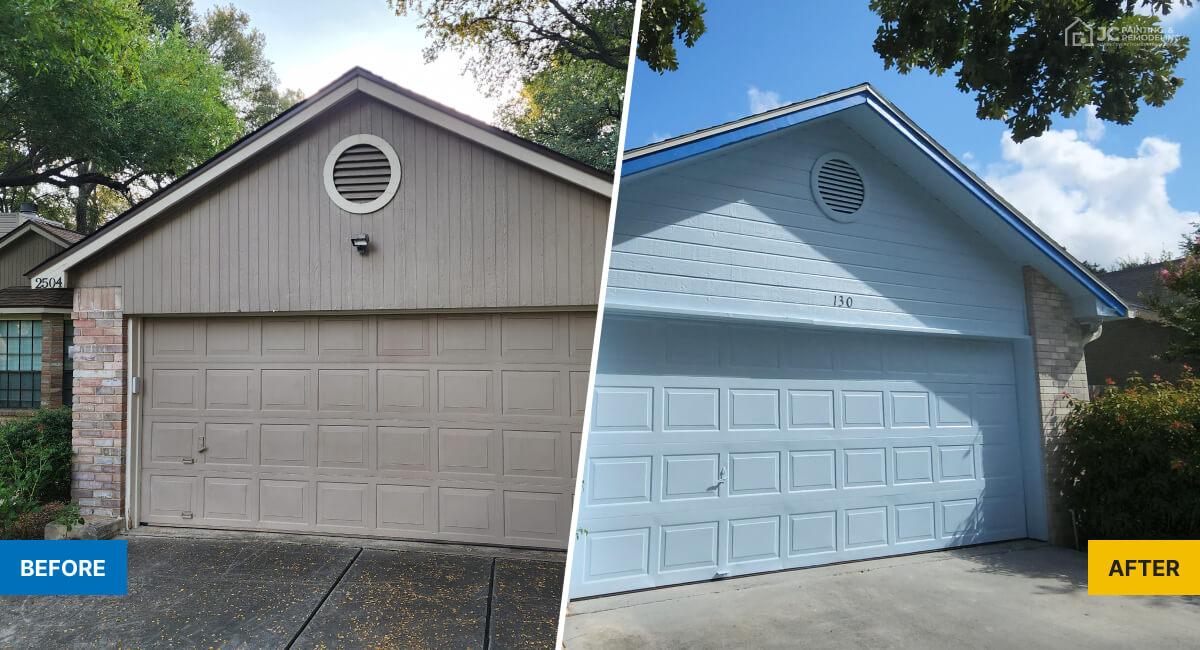
Painting your home is one of the most cost-effective ways to transform its appearance, protect its surfaces, and add measurable value before a sale. Yet it is also one of the most commonly rushed and poorly executed home improvement projects. Skipped prep steps, wrong paint choices, bad timing, and unrealistic budgets turn what should be a satisfying upgrade into a peeling, streaky disappointment within just a few years.
This guide covers everything you need to do it right: the correct painting process from start to finish, realistic cost breakdowns, the best and worst times of year to paint, and the 80/20 rule that professional painters use to consistently deliver exceptional results.
The Correct Way to Paint a House: Step by Step
Most painting failures trace back to one cause: inadequate preparation. Professional painters will tell you that the painting itself is the easy part. Everything that happens before the brush touches the wall determines how long the job lasts and how good it looks.
Step 1: Assess the Surface Condition
Before purchasing a single can of paint, walk every surface you plan to paint and assess its condition honestly. Look for peeling or flaking paint, cracks and holes, water stains, mildew, chalking surfaces, and areas where paint has lost adhesion. Each of these conditions requires specific treatment before painting begins.
Painting over problem surfaces without addressing them first guarantees premature failure. Paint does not fix underlying issues. It reveals them.
Step 2: Protect Everything You Are Not Painting
Cover floors with canvas drop cloths rather than plastic sheeting. Canvas absorbs drips while plastic causes them to smear underfoot. Remove outlet covers, switch plates, and light fixtures or cover them with painter's tape. Move furniture to the center of the room and cover with plastic sheeting. Tape along baseboards, trim, ceilings, and any edges where two surfaces meet.
Taking 30 to 60 minutes on protection saves hours of cleanup and prevents costly damage to flooring, furniture, and fixtures.
Step 3: Clean All Surfaces Thoroughly
For interior walls, wash surfaces with a TSP (trisodium phosphate) substitute solution or a mild degreaser to remove grease, dust, and residue. Kitchen walls and areas near cooking surfaces accumulate grease films that prevent paint adhesion even when the surface appears clean.
For exterior surfaces, pressure wash the entire area using 1,500 to 2,500 PSI. Address mildew-affected areas with a diluted bleach solution before rinsing. Allow surfaces to dry completely, at least 24 to 48 hours for exterior work, before proceeding.
Step 4: Repair All Damage
Fill nail holes and small wall imperfections with lightweight spackle for interior walls. Use an exterior-grade filler or epoxy wood filler for outdoor surfaces. For larger cracks or gaps around windows, doors, and trim, use a paintable exterior caulk rated for a minimum of 25 years.
Sand repaired areas smooth once dry, feathering the edges so they blend seamlessly with the surrounding surface. Failure to sand repairs flush results in visible bumps and shadows once the wall is painted.
Step 5: Sand Previously Painted Surfaces
Lightly sand all previously painted surfaces with 120 to 150 grit sandpaper or a sanding sponge. This process, called scuff sanding, creates a mechanical bond for the new paint to grip. Smooth, glossy surfaces repel new paint. A scuff-sanded surface accepts it.
Wipe all sanded surfaces with a tack cloth or damp rag to remove dust before priming.
Step 6: Apply Primer
Primer is not optional on bare surfaces, heavily stained walls, surfaces with drastic color changes, or any surface that has been repaired. Apply a high-quality interior or exterior primer appropriate to the surface material and allow it to dry fully according to the manufacturer's specifications before applying topcoat.
Skipping primer on bare or problematic surfaces is the single most common mistake DIY painters make. Paint-and-primer-in-one products are acceptable on previously painted surfaces in good condition but are not a substitute for a dedicated primer coat on compromised surfaces.
Step 7: Apply Paint Using Proper Technique
Always paint in the correct order: ceiling first, then walls, then trim and baseboards. This sequence allows you to cut in along the ceiling before worrying about the walls and to clean up wall paint on trim as you go.
For walls, use the cut-in-then-roll method. Cut in a 2 to 3 inch band along all edges, corners, and trim lines with an angled brush. Then immediately roll the field of the wall while the cut-in band is still wet. Rolling into wet cut-in lines blends the two sections seamlessly. Allowing cut-in lines to dry before rolling creates visible lap marks.
Roll paint in a W or M pattern using a roller loaded evenly with paint. Work in sections of 3 to 4 square feet, overlapping each pass slightly. Maintain a wet edge at all times by working quickly and systematically across the wall without stopping mid-section.
Apply two full coats for all color changes, new surfaces, and any project where long-term durability matters. Allow each coat to dry fully between applications according to the paint manufacturer's dry time specifications.
How Much Does It Cost to Paint the Interior of a 2,000 Square Foot Home?
Interior painting costs vary significantly based on whether you hire professionals or do the work yourself, the quality of paint selected, and the condition of the surfaces being painted.
Professional Painting Costs
Professional painters charge by the square foot of paintable wall surface, not by the total square footage of the home. A 2,000 square foot home typically has approximately 5,000 to 6,500 square feet of paintable wall and ceiling surface depending on ceiling height and number of rooms.
| Service Level | Cost Per Sq Ft | Total Estimated Cost |
|---|---|---|
| Budget painter | $1.50 to $2.00 | $7,500 to $13,000 |
| Mid-range painter | $2.00 to $3.50 | $10,000 to $22,750 |
| Premium painter | $3.50 to $5.00 | $17,500 to $32,500 |
For most homeowners, a mid-range professional paint job on a 2,000 square foot home runs between $10,000 and $18,000 for the full interior including ceilings, walls, trim, and doors.
DIY Painting Costs
| Item | Estimated Cost |
|---|---|
| Premium paint (15 to 20 gallons) | $900 to $2,000 |
| Primer (5 to 8 gallons) | $200 to $400 |
| Rollers, brushes, trays | $80 to $150 |
| Drop cloths and tape | $60 to $120 |
| Spackle, caulk, sandpaper | $50 to $100 |
| Total DIY Cost | $1,290 to $2,770 |
The tradeoff with DIY is time. A full interior paint job on a 2,000 square foot home typically takes an experienced DIY painter 5 to 10 full days of work. First-time painters should budget closer to 12 to 15 days.
What Affects the Final Price
Several factors push costs higher regardless of whether you hire out or do it yourself:
Ceiling height: Rooms with 9 or 10 foot ceilings have more surface area than standard 8 foot rooms, increasing both material and labor costs.
Number of colors: Each color transition requires additional cutting in, taping, and touch-up time.
Surface condition: Walls requiring significant patching, skim coating, or multiple primer coats increase labor hours and material costs substantially.
Trim and door count: Painting trim, baseboards, crown molding, and doors adds significant time. A home with extensive millwork can add 30% to 50% to the total painting cost.
Paint quality: Premium paints cost $60 to $110 per gallon compared to $30 to $50 for mid-grade options. The premium is worth it in high-traffic areas and on surfaces exposed to moisture.
Can You Paint a House in October? Seasonal Timing Guide
Timing your painting project to seasonal conditions is one of the most overlooked factors in achieving a long-lasting result, especially for exterior work.
The Best Months for Exterior Painting
The ideal painting window for most climates is late spring through early fall, specifically May through September. During these months, temperatures are consistently within the optimal range for latex paint application (50°F to 85°F), humidity is manageable, and daylight hours allow for full-day work sessions.
Can You Paint in October?
The answer depends entirely on your geographic region and the specific conditions expected during and after application.
Warmer southern climates: October is frequently an excellent painting month. Temperatures have moderated from summer highs, humidity is dropping, and conditions are often ideal for both application and curing. Exterior painting in October is common and successful in these regions.
Moderate mid-country climates: October is borderline. Early October often works well when daytime temperatures remain above 50°F. By late October, falling temperatures and the risk of early frost create real application risks. Monitor the forecast carefully and ensure overnight temperatures will not drop below 35°F for at least 48 hours after application.
Northern and mountain climates: October is generally too late for exterior painting in most years. Night temperatures frequently drop near or below freezing, and latex paint that freezes before fully curing will fail. In these regions, the exterior painting season effectively closes by mid-September.
What Happens When You Paint in Wrong Conditions
Painting outside the recommended temperature and humidity windows causes specific and predictable failures:
Too cold: Paint thickens, becomes difficult to apply evenly, and may not cure properly. Latex paint that freezes before curing becomes brittle and will peel within months.
Too hot: Paint dries too quickly, leaving brush and roller marks as the surface skins over before the coat can level. Lap marks become impossible to avoid.
Too humid: Moisture trapped under the paint film causes bubbling, peeling, and poor adhesion. Never paint when humidity exceeds 85% or when rain is forecast within 24 hours.
Direct sun on hot surfaces: Exterior surfaces in direct sunlight can reach temperatures far above the ambient air temperature, causing paint to dry almost instantly on contact. Always paint exterior surfaces in the shade by following the shaded side of the house throughout the day.
Interior Painting and Seasonal Timing
Interior painting is far less sensitive to seasonal conditions than exterior work because you control the environment. However, even interior painting benefits from moderate conditions:
- Keep interior temperatures between 60°F and 80°F during application and drying
- Ensure adequate ventilation to help paint cure and to exhaust fumes
- Avoid painting in very high humidity conditions, particularly in bathrooms, which can extend dry times significantly
The 80/20 Rule in Painting Explained
The 80/20 rule is one of the most practical principles professional painters apply to every project. Understanding it changes the way you approach the entire process.
What the 80/20 Rule Means in Painting
In painting, the 80/20 rule states that 80% of the final result comes from 20% of the effort, specifically from the preparation work done before a single drop of paint is applied. The actual painting itself is the faster, more visible part of the job. But the prep work determines whether that paint job looks professional and lasts for years or begins failing within months.
The 20% of effort that drives 80% of the result includes:
- Cleaning surfaces thoroughly before painting
- Sanding and scuff sanding for adhesion
- Filling and feathering all repairs
- Priming bare and problem surfaces
- Caulking all gaps and transitions
- Protecting non-painted surfaces properly
How Professionals Apply This Rule
Experienced painters routinely spend more time on preparation than on the painting itself, especially on exterior projects and older homes. A professional crew repainting an exterior may spend two full days on washing, scraping, sanding, caulking, and priming before applying a single coat of topcoat paint.
This ratio shocks many homeowners watching the job from the inside. It looks like the painters are barely painting. In reality, they are doing the work that makes the painting last.
How to Apply the 80/20 Rule as a DIY Painter
Resist the urge to rush to the painting phase. Before you open a single can of paint, make sure every repair is made and sanded flush, every surface is clean and scuff-sanded, all bare areas are primed, all gaps are caulked, and all surfaces you are not painting are fully protected.
When you do begin painting, the brush and roller work will go faster and look better than you expect, precisely because the preparation was done correctly.
The Second Application of the 80/20 Rule
There is a second way professionals apply this principle that applies specifically to interior painting. Eighty percent of the visual quality of a finished paint job comes from the cut-in work along edges, corners, trim lines, and ceiling transitions. Rolling the large open wall areas is fast and relatively forgiving. Cutting in cleanly without bleeding onto adjacent surfaces is the skill that separates professional-looking results from amateur ones.
Invest in a quality angled sash brush for cut-in work. Practice loading the brush with the right amount of paint, pressing the bristles to a fine edge, and drawing a controlled line. This skill improves rapidly with practice and makes a more visible difference to the final result than any other single technique.
Final Thoughts
Great painting results do not come from expensive paint alone, though quality paint matters. They come from disciplined preparation, correct technique, appropriate timing, and a clear understanding of where effort delivers the greatest return.
Follow the correct sequence: assess, protect, clean, repair, sand, prime, then paint. Budget realistically for materials or professional labor. Choose your painting window based on actual temperature and humidity conditions, not just the calendar date. And commit to the 80/20 principle by treating preparation as the most important phase of the entire project.
Done right, a paint job is not just a cosmetic upgrade. It is a protective investment in your home that delivers returns in durability, beauty, and value for a decade or more.

 English
 Arabic
 French
 Spanish
 Portuguese
 Deutsch
 Turkish
 Dutch
Dutch
 Italiano
 Russian
 Romaian
 Portuguese (Brazil)