
 About Urh Social
 Terms of Service
 Privacy Policy
 Contact
How the Kinoptik Tegea 9.8mm T2.3 Changes Perspective in Tight Film Locations
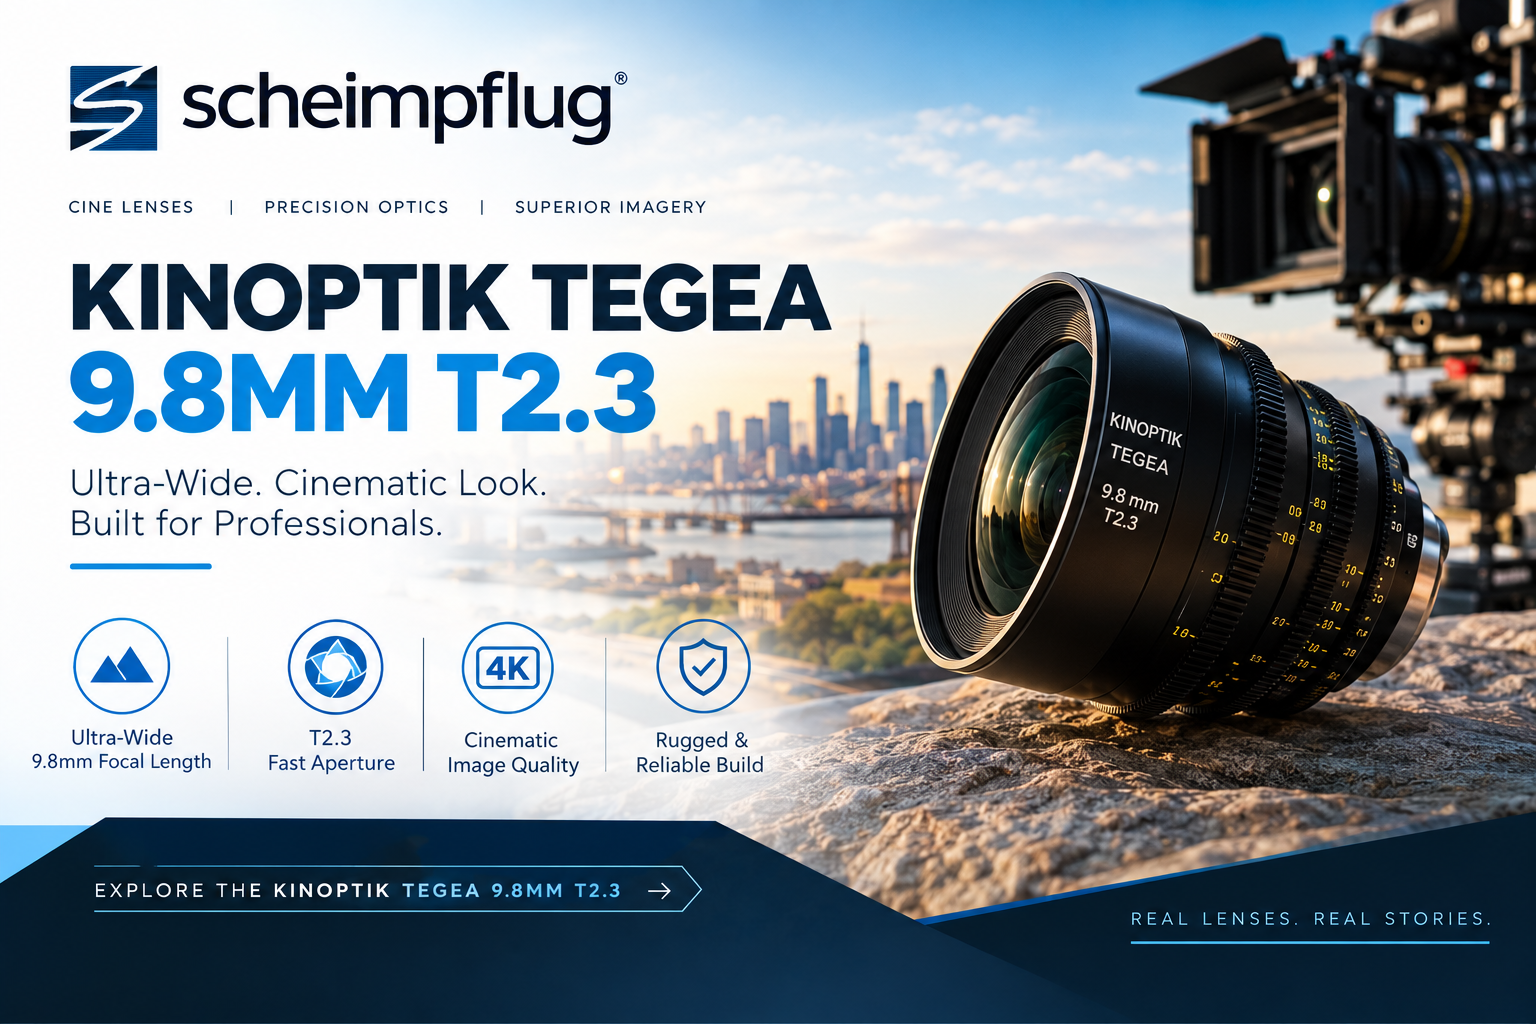
The Kinoptik Tegea 9.8mm T2.3 is a vintage wide angle lens that cinematographers still reach for when a space is too small for ordinary lenses. It was introduced in the mid 1960s and was the widest rectilinear lens made for 35mm film at the time. That title held until the Zeiss Ultra Prime 8R appeared in the mid 2000s. The lens does more than fit a large view into a small room. It also changes how depth and distance feel on screen. This article explains how the lens behaves in hallways and apartments and vehicles. It also covers practical points for camera support and lighting and planning.
Why Tight Locations Are Difficult
Many films take place in small spaces. A kitchen or an elevator or a stairwell can hold only a few people and very little equipment. The camera cannot move back to find a wider view because there is a wall behind it. The cinematographer must either accept a tight frame or choose a lens with a wider angle of view.
Standard wide lenses solve part of the problem. A 24mm or 18mm lens shows more of a room than a 35mm lens. In a very small space even those lenses may not be enough. A frame might show only one actor and a section of wall when the director wants to show the full room.
An extreme wide angle lens changes this. It allows the camera to sit close to the action and still show the setting around the subject. The lens also changes how the space feels. Distances look longer and foreground objects look larger. These effects can make a small room feel strange or tense or crowded depending on how the shot is built.
What Makes This Lens Different
The Kinoptik was built by a French company that began as a precision glass maker in 1932. After World War II the company moved into cinema lenses for 16mm and 35mm formats. Kinoptik became known for sharp and saturated images and was often compared with Cooke and Zeiss.
The 9.8mm Tegea stands out because of its optical design. The front element is flat on the outside and deeply curved inward on the back. This shape lets the lens gather a very wide view while keeping straight lines mostly straight. That is what rectilinear means. Many ultra wide lenses of the period bent straight lines into curves. The Kinoptik kept them far more natural.
Kinoptik also used rare earth elements in the glass. Over the years these materials have aged chemically. Many cinematographers describe the result as a soft glow around bright highlights and slightly lifted shadows. The center of the frame is sharp and the corners fall off more sharply than on modern lenses. This look is part of why the lens is still requested today.
Field of View in Numbers
A simple calculation shows how wide the lens is. The horizontal angle of view depends on focal length and sensor width. On a Super 35 sized sensor that is about 25mm wide a 9.8mm lens gives roughly 104 degrees horizontally. A 24mm lens on the same sensor gives about 55 degrees. An 18mm lens gives about 69 degrees.
These figures come from the standard formula and are approximate. The real view depends on the camera and the recording mode. Distortion and the actual image circle also affect the result. The comparison still shows the main point. The 9.8mm sees almost twice the width of an 18mm lens. In a narrow room that difference decides whether a wall is in the frame or behind the camera.
How the Lens Changes Perspective
Perspective is the relationship between objects at different distances from the camera. A wide lens makes this relationship stronger. Several effects follow.
Foreground objects look larger. Anything close to the lens appears much bigger than objects farther away. A hand or a shoulder or a doorframe can dominate the image. Directors use this to create a feeling of pressure or intimacy.
Depth looks stretched. A hallway appears longer than it is. A room seems to open away from the camera. This can make a small apartment look more spacious or can make a corridor feel endless.
Edges stretch faces and figures. Objects near the edge of the frame look wider than objects in the center. A face placed near the edge looks distorted. The effect can be strong on a lens this wide. Some filmmakers avoid it and others use it on purpose.
Camera height and tilt matter. Tilting a wide lens up or down makes vertical lines lean. A building or a doorway can appear to tip inward. Keeping the camera level reduces this. Tilting the camera on purpose adds tension.
Movement feels faster. When the camera moves forward in a narrow space the walls pass quickly at the edges of the frame. The sense of speed is greater than with a longer lens at the same walking pace.
How Filmmakers Have Used the Lens
The lens has a long record of use in confined or crowded settings. Its history shows how different directors have treated the same optical traits.
The Kinoptik first appeared on screen in the 1964 film I Am Cuba. The film used long tracking shots that moved through crowds and rose into the sky. The wide view let the camera stay close to people without losing the surrounding scene.
In the 1970s Stanley Kubrick used the lens in A Clockwork Orange. It was mounted on a handheld Arri 2C. The close and distorted view placed the audience in the middle of the action. Kubrick later used it on The Shining with Garrett Brown's Steadicam. It followed the characters through the snowy hedge maze. The distortion added to the nervous energy of the scene.
In the 1990s Christopher Doyle used the lens in his work with Wong Kar Wai. Films such as Chungking Express and Fallen Angels show crowded streets and small rooms in Hong Kong. The wide view and the extreme angles gave the city a restless look. In Fallen Angels Doyle added a Century wide angle adapter. This stretched faces and city scenes even further.
These examples share one idea. The lens works best when the filmmaker accepts its character and builds the shot around it.
Working in Hallways, Vehicles, and Small Rooms
Tight spaces bring practical problems beyond the lens itself. A few points help crews plan.
Check the frame for the crew. A lens this wide sees almost everything. Lights and stands and microphones can appear at the edges of the frame. Crew members may also be visible. Walk through the shot with the lens on the camera before the actors arrive.
Plan the camera position. In a narrow hallway the camera may sit only a short distance from the actor. At that distance small changes in position create large changes in the image. Mark the exact camera location so each take matches.
Watch the actor's distance. Faces near the lens look distorted. Keeping an actor a little farther away reduces the effect. Moving the actor closer increases it. Decide which look the scene needs before filming.
Think about vehicles. A wide lens suits the inside of a car or a train. It can show the driver and the passenger and the view outside in one frame. Space for the camera is limited so mounting points should be checked in advance.
Use height to control lines. Placing the camera at the middle height of the subject keeps vertical lines straighter. A lower or higher position will lean them.
Camera Support and Movement
Wide lenses reward movement. A camera that travels through a space shows the scale of the room and the position of each object. The Kinoptik has been used on handheld rigs and on Steadicam in past films. Both approaches suit tight locations because the camera operator can move through narrow gaps.
A few points apply to any support method.
Weight and balance should be tested early. Vintage lenses vary in size and weight and the camera needs to balance with the lens attached. A small imbalance becomes tiring during a long handheld day.
Focus needs attention. A very wide lens has deep focus at most apertures but close subjects still need careful marks. At close distances the depth of field becomes shallower than people expect. A focus puller should rehearse the shot with the real lens.
Stability matters in a tight space. A wide lens exaggerates small camera movements. A slight shake at the edge of the frame looks larger than on a longer lens. A stabilized head or a Steadicam can help when smooth movement is needed.
Lighting a Space That the Lens Sees Entirely
Lighting is often the hardest part of working with a very wide lens. The lens sees the whole room so the usual hiding places for lights are visible.
Small and flexible lights help. Compact LED units can be placed in corners or behind furniture. Practical lights that are part of the set can also provide illumination. Lamps and signs and windows can be used as sources if they are within the frame.
The lens has a natural glow around bright highlights. Lights in the frame will bloom and spread. This can look attractive on a neon sign or a lamp. It can also reduce contrast in a scene with many bright sources. Test the lights with the lens before the shoot day so the effect is known in advance.
Flare is also part of the look. A light shining near the edge of the frame can create reflections inside the lens. Some cinematographers welcome these effects. Others use flags to block unwanted light. Decide in advance how much flare the story can accept.
Planning Tight Locations With Scans
Detailed planning saves time in small spaces. One useful tool is a scan of the location. A production that orders LiDAR scanning NYC crews perform receives an accurate three dimensional record of a room. The data shows wall positions and ceiling height and the location of doors and windows.
This helps in two ways. The camera team can test lens positions before the shoot day. They can measure how much of the room each lens will show and where lights can be hidden. The visual effects team can also use the data. If a shot includes digital elements the scan provides the real dimensions of the space. Lens distortion must be matched in post production so that digital objects fit the image.
Actors can be scanned as well. A close wide angle shot places a performer near the camera and the face is visible in detail. If the production needs a digital double for that shot the model must match the real face. Studios that offer 3D body and head scanning NYC productions use can record the head and body at high resolution. Artists can then apply the same lens distortion to the model so it matches the filmed footage.
These steps are not needed on every project. They are useful when a shot combines a very wide lens with visual effects or when a location cannot be revisited.
Pairing the Lens With Other Vintage Glass
The 9.8mm is rarely used alone. Most films need a range of focal lengths. Scheimpflug notes that the lens pairs well with vintage sets such as Cooke Speed Panchro and Super Baltar and Zeiss Super Speeds. These lenses share a softer and more organic look than many modern designs.
A common approach is to use the Kinoptik as a special lens for selected shots. The rest of the film is shot on a matched set. This keeps the overall look consistent while giving the filmmaker a tool for tight or dramatic moments.
The lens has a strong character so it should be tested next to the main set. Compare color and contrast and sharpness at the edges. Small differences can be adjusted in grading but large differences are better understood before filming.
Preparing Before the Shoot
A vintage lens needs more preparation than a modern one. A checkout and a test day are worth the time.
Confirm the mount and the camera. Vintage lenses may need adapters or special mounts. Confirm that the lens will cover the sensor size and recording mode of the camera. Edge fall off and vignetting should be tested at the chosen settings.
Run a distortion test. Shoot a grid or a simple chart at the working distances. This shows how lines bend near the edges and how the frame changes with camera height.
Test with the actual lighting. Check flare and halation with the lights planned for the scene. Adjust flags and positions based on what appears on the monitor.
Review the footage on a large screen. Small issues are easy to miss on a camera monitor. Looking at the footage at full size shows corner softness and color shifts.
A rental house with a full camera department can support this process. Scheimpflug's Camera Rental In NYC department in Chelsea offers cinema cameras and lenses and accessories. Crews can check out equipment and test it before the shoot. The company also supports lighting and grip needs. A production that wants to rent film equipment new york teams depend on can arrange the lens and the camera and the lighting through one order.
Common Mistakes to Avoid
Several errors appear often with extreme wide lenses.
Placing the camera too close to faces. The distortion becomes unflattering unless it is intended. Test the distance first.
Forgetting the edges of the frame. Crew and equipment appear where they are usually hidden. Check all four corners.
Tilting without a plan. Leaning vertical lines can look like a mistake. Tilt only when the story supports it.
Skipping a distortion test. Visual effects teams need to know how the lens bends the image. Without a test the match takes longer.
Using the lens for every shot. The look is strong and it can tire the viewer. Use it for moments that need it.
Conclusion
The Kinoptik Tegea 9.8mm T2.3 gives filmmakers a very wide view and a distinct visual character. It lets the camera sit close to the action in narrow rooms and still show the setting around it. It also stretches depth and enlarges foreground objects and softens highlights with a vintage glow.
Good results depend on preparation. Check the frame and test the lens with the camera and plan the lighting. Scans of the location and the actors can support visual effects work when needed. A rental house that offers cameras and lenses and lighting under one roof makes this process simpler for the crew.
Frequently Asked Questions
Q: What makes the Kinoptik Tegea 9.8mm T2.3 special?
A: It was the widest rectilinear lens made for 35mm film when introduced. It keeps straight lines mostly straight and has a vintage glow around highlights. These traits suit tight locations and have attracted directors such as Stanley Kubrick.
Q: Why use an extreme wide lens in a small room?
A: A very wide lens lets the camera sit close to the action while still showing the surrounding space. It can show more of a small room than a standard wide lens and it changes how depth and distance feel on screen.
Q: Does the lens distort faces?
A: Yes. Faces near the camera or near the edge of the frame can look stretched. Keeping the actor a little farther away reduces the effect. Many filmmakers use the distortion on purpose for tense or unusual scenes.
Q: Can the lens be used handheld or on a Steadicam?
A: Yes. Past films used it on a handheld Arri 2C and on a Steadicam. The camera should be balanced with the lens attached. A wide lens exaggerates shake so stable movement and careful testing are recommended.
Q: Why scan a location before shooting with a very wide lens?
A: A scan records exact room dimensions. Crews can test lens positions and hide lights more easily. Visual effects teams can also use the measurements to place digital elements and match the lens distortion in post production.

 English
 Arabic
 French
 Portuguese
 Deutsch
 Turkish
 Dutch
 Italiano
 Russian
 Romaian
 Portuguese (Brazil)
 Greek