


 About Urh Social
 Terms of Service
 Política de privacidade
 Contact
Best Way to Digitize FSL File for Embroidery Projects
Introduction
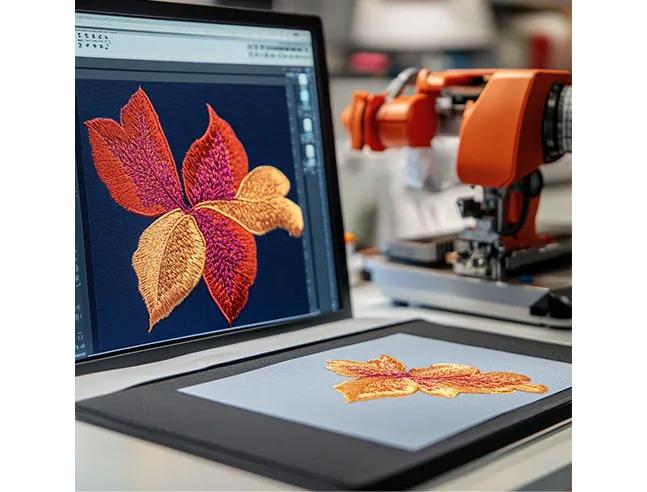
Imagine creating delicate, lacy snowflakes, intricate doilies, or freestanding monograms that you can hold in your hand—no fabric backing needed. This is the magic of Freestanding Lace (FSL) embroidery, a technique that turns your embroidery machine into a lace-making powerhouse. But creating these stunning, three-dimensional pieces requires more than just picking a random design. The process starts long before the needle moves, with a crucial step: learning how to Digitize FSL File for Embroidery. Unlike standard embroidery, FSL demands a specific digitizing strategy to ensure your lace is strong enough to stand alone yet delicate enough to look beautiful. This guide will walk you through everything you need to know, from the core principles to the best software and workflows, so you can start creating your own stunning freestanding lace.
What Exactly is FSL Embroidery?
First, let's define the end goal. FSL stands for Freestanding Lace (sometimes called Freestanding Lacework or Filo). It’s a technique where you embroider a dense, interconnected design onto a special stabilizer (like water-soluble or heat-away film). Once the stitching is complete, you wash away or peel off the stabilizer, leaving behind a self-supporting piece of embroidery made entirely of thread.
Think of it as thread architecture. The final piece is not applied to another item; it is the item—an ornament, a jewelry component, a decorative appliqué, or a delicate holiday decoration. Because there’s no supporting fabric, the thread itself must form a solid, stable structure.
Why Digitizing for FSL is a Different Beast
You cannot simply take any embroidery file and stitch it on water-soluble stabilizer. A standard embroidery file is designed to be stitched onto a stable surface. Its priority is visual appeal on fabric, not structural integrity in mid-air.
When you Digitize FSL File for Embroidery, you are essentially engineering a tiny, thread-based bridge or truss. Every stitch has a structural job. Poor digitizing leads to a frustrating result: a floppy, misshapen, or broken piece of lace that falls apart when the stabilizer dissolves.
The core philosophy shifts from "How does this look on the shirt?" to "How does this hold itself together?"
The Golden Rules of FSL Digitizing
To create a successful FSL file, you must follow these non-negotiable principles during the digitizing process.
1. Density is Everything
This is the most critical rule. FSL requires very high stitch density. In standard embroidery, high density can cause puckering. In FSL, high density creates the structure.
-
Satin Stitches: Columns must be wide and dense. A good rule of thumb is to keep satin columns above 2.5mm wide, with a tight density (often 0.4mm or less between stitches). Thin, sparse satin stitches will be weak and curl.
-
Fill Stitches: All fills must be dense and should use a relatively short stitch length. Open or lightweight fill patterns will not hold together. The fills act as the "walls" and "floors" of your thread structure.
2. Connectivity: No Floating Islands
Every single element of the design must be connected to another element in at least two places. A single connection point creates a weak pivot joint. Think of a snowflake: each arm is connected to the center and often has bridging elements to other arms.
-
The "Two-Point Minimum" Rule: If you have a circle in your design, it cannot just be attached with one thin satin column. It needs multiple connecting bridges. Isolated shapes will fall off.
-
Strategic Bridges: You often need to add small tie-down bars or bridges in your digitizing that aren't in the original artwork, purely for structural integrity.
3. Underlay is Your Foundation
In standard embroidery, underlay stabilizes fabric. In FSL, underlay binds the top stitches together. It’s the rebar inside your concrete.
-
Mandatory Use: Use a strong, grid-like underlay (like a perpendicular or crosshatch fill) beneath all large fill areas. For satin columns, a center-run or edge-run underlay adds crucial strength.
-
Increased Tie-Offs: You may need to manually add extra lock stitches (tie-offs) at the start and end of underlay sections to prevent unraveling.
4. Stitch Direction and Compensation
-
Balanced Angles: In fill areas, use stitch angles that provide strength in multiple directions (often 0 and 90 degrees, or 45 and 135). This prevents the piece from stretching or distorting in one direction.
-
Generous Pull Compensation: Because of the high density, thread pull is significant. You must digitize shapes slightly larger than desired, knowing the pull will shrink them. This is learned through testing.
Best Software Tools for FSL Digitizing
While you can apply FSL principles in almost any digitizing software, some make the job easier.
1. Hatch Embroidery by Wilcom
Why it's great for FSL: Hatch’s powerful fill tool and precise density controls are ideal. Its ability to easily create complex underlays and its excellent stitch simulation let you spot weak areas before you stitch. The wide library of included FSL-specific designs is also a fantastic learning resource to reverse-engineer.
Best For: Most embroiderers getting into FSL. Its balance of power and usability is perfect for this task.
2. Embrilliance (with StitchArtist Levels)
Why it's great for FSL: Embrilliance’s intuitive, node-based editing makes it easy to add those crucial connecting bridges and adjust individual stitch points. Its non-destructive workflow is helpful for experimenting with density and underlay.
Best For: Those who prefer a very hands-on, point-by-point approach to digitizing their lace structures.
3. Brother PE-Design
Why it's great for FSL: If you own a Brother machine, the integration is seamless. It has capable tools for creating dense fills and satin stitches. While less specialized than Hatch, it is more than sufficient for creating FSL designs once you understand the principles.
Best For: Brother users who want to stay within their brand ecosystem and work on moderately complex FSL projects.
4. Specialized FSL Plugins & Packs
Some software, like certain versions of Wilcom, offers specialized lace-design toolkits. These can automate some connectivity and density rules, but they are generally for advanced or industrial users. For most, mastering the principles in standard software is more than enough.
Step-by-Step Workflow: Digitizing a Simple FSL Motif
Let’s trace the thought process of creating a basic FSL star ornament.
-
Artwork & Mindset: Start with a simple, bold graphic of a star. Mentally identify potential weak points: the sharp points of the star.
-
Set Up & Trace: In your software, import the star graphic. Trace the outline using a Satin Column tool, but set the width to a sturdy 3.0mm or more.
-
Create the Structure:
-
Fill the Center: Use the Fill Stitch tool to fill the center of the star. Set density to "High" or manually input a tight setting (e.g., 0.35mm).
-
Add Underlay: Apply a crosshatch underlay to this fill area.
-
Connect the Points: Digitize small satin stitch "bridges" from the tip of one star point to the tip of another, forming a web inside the star. This is your critical structural step that the original artwork didn't have.
-
-
Refine for Strength:
-
Add an extra run stitch outline just inside your main satin border for reinforcement.
-
Check that every element is connected at multiple points.
-
-
Simulate and Save: Run a stitch simulation. Look for sparse areas or single connection points. Adjust. Save your file in your machine's format (PES, DST, etc.).
Testing and Refining: The Non-Negotiable Step
Your first FSL digitizing attempt is a prototype, not a final product. The test stitch is your most important teacher.
-
Stitch It Out: Use two to three layers of heavy water-soluble stabilizer (like Sulky Ultra Solvy). Hoop it tightly.
-
Inspect Before Dissolving: Look at the stitched piece on the stabilizer. Does it lay flat, or does it pull up? Are there obvious weak spots?
-
Dissolve Carefully: Follow the stabilizer's removal instructions. Does the piece hold its shape? Does it flop or break?
-
Go Back and Adjust: If it’s weak, increase density and add more connecting bridges. If it’s distorted, adjust pull compensation. This cycle of stitch-test-adjust is how you master FSL digitizing.
Common Beginner Mistakes to Avoid
-
Using Standard Design Files: Trying to use a file meant for apparel will almost always fail. The density is too low.
-
Neglecting the Bridges: Forgetting to add structural connections is the #1 cause of pieces falling apart.
-
Skimping on Stabilizer: Using only one layer of lightweight stabilizer won’t support the dense stitches, leading to puckering and poor results even before washing away.
-
Rushing the Dissolve: Aggressively rinsing or handling the lace before it's fully dried/cooled can distort your delicate work.
Conclusion: Building with Thread
Learning how to Digitize FSL File for Embroidery is one of the most rewarding skills in the machine embroidery world. It transforms your machine from a decorator into a creator of standalone objects. It requires a shift from artistic thinking to engineering thinking—where every stitch is a load-bearing member in a tiny, beautiful structure.
Start simple. A basic monogram or a small geometric shape is the perfect first project. Apply the rules of high density, mandatory connectivity, and strong underlay. Embrace the test-stitch cycle as part of the creative process, not as a failure. With practice, you’ll develop an intuition for what thread can do, and you’ll unlock the ability to design and create heirloom-quality lace that amazes everyone who sees it. Your journey into the airy, strong world of freestanding lace starts at your digitizing screen.

 English
 Arabic
 French
 Spanish
 Portuguese
 Deutsch
 Turkish
 Dutch
Dutch
 Italiano
 Russian
 Romaian
 Greek
Greek